A few thingz
Joseph Basquin
29/07/2026
#audio
The definitive guide to Ableton Live's delay compensation and reduced latency
(A small "Note to self" post, while producing music)
Two options are often misunderstood in Ableton Live: "Delay compensation" and "Reduced latency when monitoring". Even after watching many tutorials, blog articles, videos about this, it might still be unclear.
The best way to clearly understand what is going on is to do this small experiment (do it, it takes 2 minutes and you'll understand this once for all!):
Options > Delay Compensation
- 0: Start with a new empty project
- 1: Set Metronome ON
- 2: Put an audio Clip on Track 1 which is in perfect sync with the beats/metronome (e.g. a kickdrum on each beat)
- 3: Add 20 instances of Compressor with "Lookahead 10ms" (see bottom of the Compressor settings) on Track 1
- 4: Let's say playback is stopped
- 5: Put "Delay compensation" ON => Hit
<SPACE>key => there is an initial delay of 200ms (pay attention to it!), but then Metronome + Clip play in sync! -
6: Put "Delay compensation" OFF => Hit
<SPACE>key => the metronome plays immediately, but then the Clip arrives 200ms too late, out of sync!TL;DR: when Delay compensation is "ON", everything is in sync, the delays introduced by VSTs are compensated, but the price to pay is that everything is delayed (of 200ms in this example)! Redo steps #5 and #6 until you clearly hear the difference.
Options > Reduced Latency When Monitoring
- Repeat steps #0 to #5 from previous paragraph
- Add a second audio Track with Monitor set to "IN", armed for Recording, for example with your laptop's built-in mic, but leave this track empty with no audio effect/no VST
- Put "Reduced Latency When Monitoring" OFF (default) => Speak in the mic => You'll notice a 200ms delay between your voice and the Live monitoring playback!
-
Put "Reduced Latency When Monitoring" ON => Speak in the mic => You'll notice far less delay!
What happens here? When it is OFF, since Track 1 has to be delayed of 200 ms delay (because of the many Compressors!), ... then Track 2 is also delayed of 200ms, to keep everything in sync.
When it is ON, then Track 2 doesn't get delayed (it has no latency-generating effect/VST on the track after all!)... Less latency, which is good, but the price to pay is that Track 2 is now no more in sync with Track 1, hehe!TL;DR: You go to the cinema with a friend. Your friend is 10 minutes late. "Reduced Latency When Monitoring" OFF basically means "Ok I support my friend, wait for him, and enter the cinema 10 minutes late". "Reduced Latency When Monitoring" ON means "No way, I'm myself not late, why should I wait? Let's go in right now!"
"Keep Latency" buttons
This new Ableton Live 12 option seems pretty interesting, I haven't tested it yet. To be written.
Buffer Size, Input Latency, Output Latency, Driver Error Compensation, Overall Latency
This is documented everywhere, so I won't reexplain this in detail. About Driver Error Compensation, Overall Latency, see end of next paragraph.
Note on monitoring IN / AUTO / OFF setting
-
If you do a recording on a track with Monitor set to IN or AUTO, it will be shifted in time, and not in sync.
-
If you set Monitor to OFF, then it will be recorded in sync. See this Youtube video on this topic, and the Monitoring in Live article:
Why are my recordings out of sync? If the track monitor is set to "In" or "Auto" and you start recording, the recorded audio or MIDI is played back using the exact same timing and placement as what you've played. Depending on how large the buffer size or sample rate is, and how many latency-inducing devices are in the set, the recorded notes or audio could be offset in relation to the rest of the clips in the set. If you're playing in by hand then the difference is usually not so perceptible as the timing will already be quite loose in feel. However if you're recording from a fixed source (eg. a hardware synth playing a quantized pattern, or a drum machine) then the offset will probably be quite noticeable. In those cases we recommend setting the monitor to "Off" instead.
When the monitor is set to "Off" then Live compensates by offsetting the recorded material by the exact amount in the "Overall Latency" section in Audio preferences. -
To finetune this, start a new project, put metronome ON, on a track set to Monitor OFF, do a recording with the microphone to record the "click" of the metronome. If it's not perfectly in sync (example: I have a 28ms offset with my soundcard), then go to Options > Preferences > Audio > Driver Error Compensation and set it to 28ms. Then the reported "Overall latency" will increase (that's normal, it corresponds to the reality and allows a more accurate compensation!). Then the compensation will be perfectly accurate when recording in Monitor=OFF mode. Indeed, once again:
When the monitor is set to "Off" then Live compensates by offsetting the recorded material by the exact amount in the "Overall Latency" section in Audio preferences.
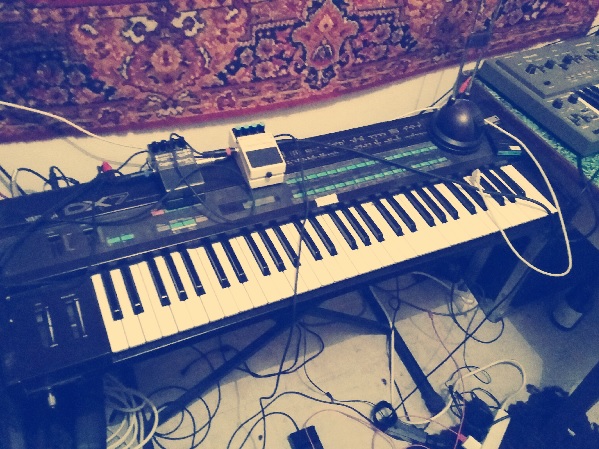
Why do I always have cables everywhere?
An improved Launchpad for Ableton Live
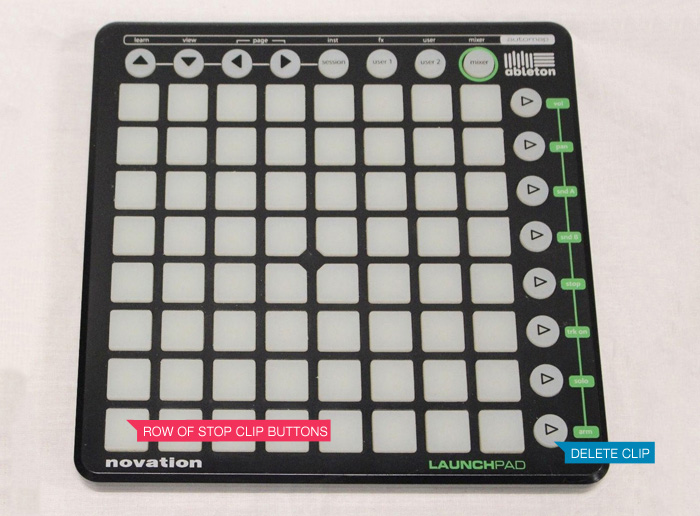
The Novation Launchpad is a great controller for Ableton Live, especially because it allows you to play / jam / record without having to look at the computer screen.
Except for one thing: you can play a clip, record a clip, stop a clip... but you cannot delete a clip. This limitation can be annoying, because sometimes when playing with your synth/guitar/whatever you need to record many takes before having the right one, and you also want to be able to immediately delete the bad recordings. Strangely, this was not possible with the Launchpad (now possible with Launchpad Pro, but it is more than twice as expensive).
So here is a "MIDI remote script" (just a little .py file) that you can copy in C:\ProgramData\Ableton\Live 10 Suite\Resources\MIDI Remote Scripts\Launchpad (for Windows, or the equivalent folder on Mac), that adds this feature to the Launchpad: the bottom right button will be a "delete the currently selected clip" button.
Bonus: this script also transforms the last row of the Launchpad into "stop clip" buttons, which is quite useful.
Download: MainSelectorComponent.py
Enjoy!
PS:
-
Don't forget to backup the aforementioned folder before adding this file, so that you can easily remove this extension if necessary.
- You can customize the Launchpad or any other controller as much as you want by editing these "MIDI remote script" Python files!
Low latency audio on a Windows PC with the built-in soundcard
Update: if you're into sampling or beatmaking, here is how to remove drums from a song!
So you want to use your music production software, with low latency on your PC/Windows laptop?
You have basically two options:
- use an external USB soundcard (but sometimes you're not in your studio - maybe traveling - and it is not an option to have a soundcard in your backpack!)
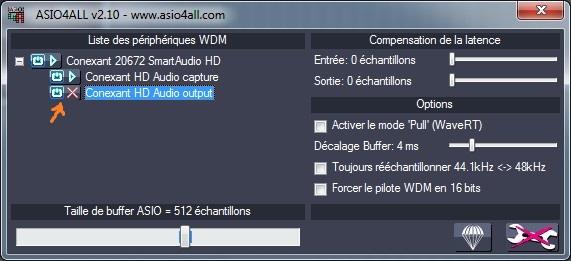
- use a (free) driver named "ASIO4ALL"
Michael Tippach's ASIO4ALL is incredibly useful for the PC music community since more than 10 years, because it turns your cheap computer's built-in soundcard into a low-latency one! With ASIO4ALL, you can plug a MIDI keyboard and play piano or synth with no "delay". Without it, the delay of more than 50 ms between the keypress and the sound makes it nearly impossible to play.
But ASIO4ALL has one major drawback: it's not multi-client. This means that if your DAW is open with ASIO4ALL as sound driver, then, if you open:
- an external sound editor, such as SoundForge, to edit a sample
- or your media player to listen to a MP3 (for example to compare the mix you're currently working on with another song)
- or Youtube in your browser, to get some inspiration from your favourite artist
... then it won't work: the audio is not available for them: your DAW and ASIO4ALL have locked your soundcard.
This is really annoying and I can't count how many hours of my life I wasted since 10 years to find a solution for this (every few months/years I retried and retried and benchmarked every new method). (Ok switching to Mac would have been a faster solution...)
The real difficulty is that we would like to use
Setup (1): A music software in ASIO + a standard application like Firefox using the so-called Windows WDM driver
Here is a list of things I tried, unsuccessfully:
-
Contact the author of ASIO4ALL and ask if a multiclient version would be possible
-
WASAPI drivers: promising Microsoft audio low-latency API but unavailable in Ableton Live (even version 10)
-
Asio2Ks [asio2ks_beta.zip, 118 KB], apparently not working anymore on Windows 7 / 64 bit. Copying the .cpl file gave nothing, and it seems impossible to open it once in
C:\Windows\System32 -
Vidance AsioMulti [asiomulti.msi, 4073 KB] (another link here), not working for the setup (1), maybe it would work for 2 ASIO programs, but not for 1 ASIO + 1 WDM at the same time. It made SoundForge crash when starting Ableton + SoundForge at the same time
-
FL ASIO driver (coming with FL Studio 12 demo): you can have audio both in the DAW (FL Studio but also Ableton Live, etc.) and in another program, but unfortunately, on my standard i5 laptop, the latency with FL ASIO is much poorer than with ASIO4ALL and there are many "crackles" when playing a VST instrument, whereas with ASIO4ALL everything is smooth (no such problem even with the lowest latency value)
-
Jack: the famous virtual cable solution for Linux, ported for Windows. I tried it a few days, but finally I always ended with artefacts, audio glitches, etc.
-
Eugene Muzychenko's VirtualAudioCable, screenshot here, same problem, I finally didn't use it
-
Vincent Burel's VirtualAudioCable (yes there are two programs by two different editors having the same name), I maybe should retry it again.
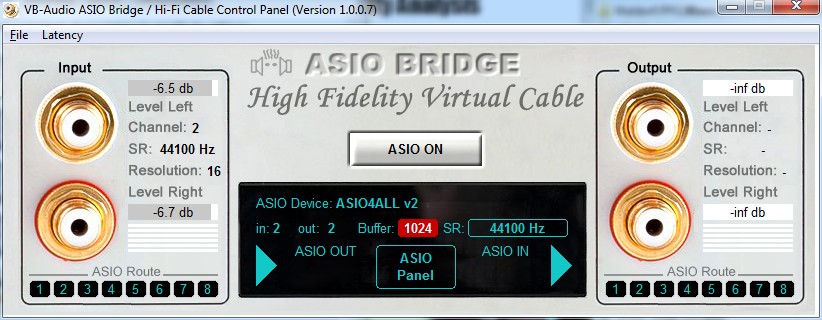
- Hi-Fi CABLE & ASIO Bridge, by the same author, is even closer to what I'm looking for. (Feature request: it would be great if it could set its "Hi-Fi Cable Input" device as default Windows playback device on startup of the program, and restore the standard speakers on exit). Strangely, it has worked once, but now, on startup of the program, I have a
Buffer: 1024blinking in red, and no sound, never mind! This might be because the buffer 1024 is too small for this software, but then it's surprising - AsioLinkPro works with a 512 buffer-size. Edit: now fixed after a reboot with a 4096 buffer. After some further tests, it finally does not work for the setup (1): this program does a bridge WDM => ASIO (ASIO4ALL in my case), but then my soundcard is no more available for ASIO4ALL in Ableton Live (screenshot here), which is totally logical. Conclusion: another bridging method is required, see setup (2) below.
Now, promising solutions:
-
O-Deus AsioLinkPro 2.4.2: nearly working for the setup (1) described above (still some glitches when playing an audio file of < 200 ms. Why would you want to play such short files? This is useful when you browse your sample library: kicks, snares, etc. are usually short samples)
-
O-Deus AsioLinkPro 2.4.4.2: totally working, perfect solution, in combination with ASIO4ALL. It even sets its device as "default Windows playback device" when we launch the program, and automatically removes it on exit... Except that this software is discontinued and it's impossible to buy a new license... (This has changed, see update below)
Here is AsioLinkPro's clever idea: you still use ASIO4ALL as output, but this way:
Setup (2):

Ableton Live (or any other DAW)    --> ASIO: AsioLinkPro                  \
                                                                            --- AsioLinkPro mixer --> ASIO4ALL
Firefox or Chrome or SoundForge    --> WDM: ASIOVADPRO virtual device     /
    or MP3 player                          (AsioLinkPro)
Clever, because even if there are 2 programs producing sound, AsioLinkPro is the only one which speaks directly with ASIO4ALL (which would not support 2 programs).
It must have been tricky to code it because it requires to code a "WDM virtual speaker device" Windows driver + an ASIO driver, phew!
Even if it's discontinued, at least it gives an idea about how to do it. Let's write such a minimalist open-source tool?
Note: not something very big and complex like Jack, but just a small WDM virtual speaker driver and an ASIO driver that both mix their content and send it to the ASIO4ALL output. (No GUI is even required).
Now, a working solution (update 2019):
-
FlexASIO 1.5 allows me to get 3.6ms latency in Exclusive Mode (non multi-client) and 20ms on Shared Mode with my laptop's built-in soundcard. A few months ago, I was unable to make it work when testing the version 0.1, but the development is currently very active, and it has evolved into a good solution. Here is my configuration file (
C:\Users\User\FlexASIO.toml):backend = "Windows WASAPI" bufferSizeSamples = 128 [input] device = "" [output] suggestedLatencySeconds = 0.0 wasapiExclusiveMode = true # change to false to have multiclientFlexASIO works great, it unfortunately can only handle one input channel at a time.
- O-Deus AsioLinkPro 2.4.4.2 (link here) is now available for free (the family of the developer seems to have authorized the release, see this post for more details). A patcher is required, that can be found here.
Interested for future evolutions and other (audio) tools?
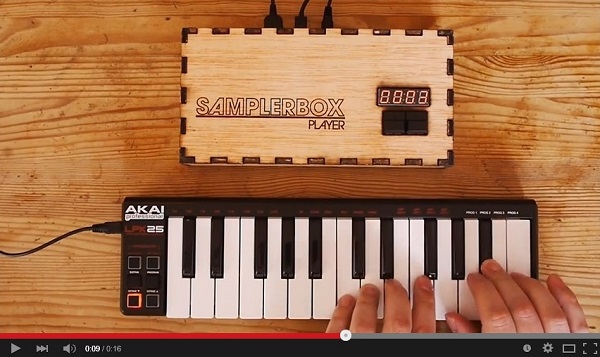
SamplerBox - a hardware sampler (to be continued)
This is in my Top10 biggest projects.
For many years, I had been looking for a small portable inexpensive sampler that can be used to play a good 1 GB piano sample set (with many velocity layers and supporting sustain pedal), a 500 MB Rhodes piano sampleset, drums, etc. and all sorts of sounds.
There was nothing like this on the market, but instead:
-
expensive samplers or expanders (800€+) that can do all of that, but they usually are not very portable
- cheap samplers like the Korg Volca Sample or the Akai MPX16, but they only offer a few MB of sound, and usually support no velocity layers, the loading time can be very long, etc.
So I started brainstorming about this (this was my first sketch, I always search ideas with a pen + paper):
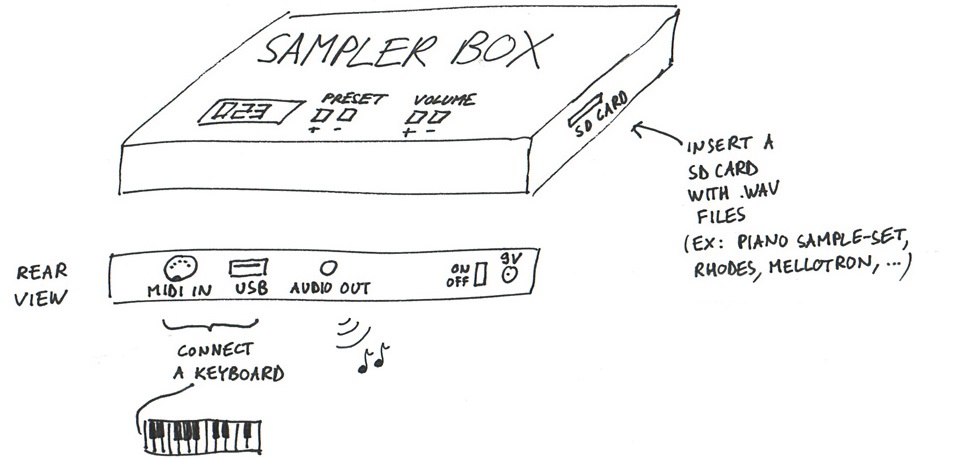
... and came to the idea that this could be possible with a Raspberry Pi. I then started to code a mixing engine in Python. Everybody told me "This is impossible, you won't be able to have a decent polyphony with Python, it's not fast enough...". The challenge was appealing for this reason and also because the only solutions available on Raspberry Pi at that time were 6-voice polyphony software samplers.
I spent days on this, and finally released both open-source code and hardware (rough) schematics:
Here is the blog: https://www.samplerbox.org/blog
I was happy to achieve a polyphony of ... nearly 100 voices at the same time, so my mixing engine in Python+Cython was not too bad ;)
Then it's a long story, many people contacted me, a commmunity growed on the forum (I should do a post about the software powering the forum, it's handmade too), etc.
(to be continued...)
Working with audio files in Python, advanced use cases (24-bit, 32-bit, cue and loop markers, etc.)
Python comes with the built-in wave module and for most use cases, it's enough to read and write .wav audio files.
But in some cases, you need to be able to work with 24 or 32-bit audio files, to read cue markers, loop markers or other metadata (required for example when designing a sampler software). As I needed this for various projects such as SamplerBox, here are some contributions I made:
-
The Python standard library's wave module doesn't read cue markers and doesn't support 24-bit files. Here is an updated module:
that adds some little useful things. (See Revision #1 to see diff with the original stdlib code).
Usage example:
from wave import open
f = open('Take1.wav')
print(f.getmarkers())
If you're familiar with main Python repositery contributions (I'm not), feel free to include these additions there.
-
The module scipy.io.wavfile is very useful too. So here is an enhanced version:
Among other things, it adds 24-bit and 32-bit IEEE support, cue marker & cue marker labels support, pitch metadata, etc.
Usage example:
from wavfile import read, write
sr, samples, br, cue, cuelabels, cuelist, loops, f0 = read('Take1.wav', readmarkers=True,
    readmarkerlabels=True, readmarkerslist=True, readpitch=True, readloops=True)
write('Take2.wav', sr, samples, bitrate=br, markers=cue, loops=loops, pitch=130.82)
Here is a Github post and pull-request about a hypothetical merge to Scipy.
Here is how loop markers look like in the good old (non open-source but soooo useful) SoundForge:

Lastly, this is how to convert a WAV to MP3 with pydub, for future reference. As usual, do pip install pydub and make sure ffmpeg is in the system path. Then:
from pydub import AudioSegment
song = AudioSegment.from_wav("test.wav")
song.export("test.mp3", format="mp3", bitrate="256k")
will convert a WAV file to MP3.
Interested for future evolutions and other audio programming tools?
Get the reverb impulse response of a church
I recently recorded an impulse response of the reverb of a 14th-century church (more or less the footprint of the sound ambiance of the building). Here is how I did it.
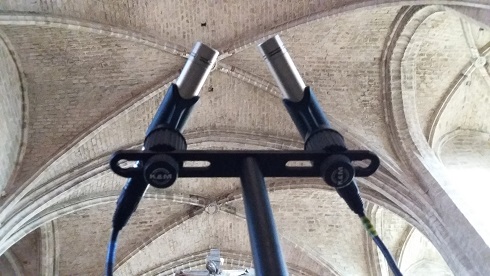
- First I installed a loudspeaker (a studio monitor Yamaha HS-80M) in the church, quite high from the ground. I played, rather loud, a sound called a frequency sweep, that contains frequencies from 20Hz to 20000Hz, i.e. the entire human hearing range.
- Then, in the middle of the church, I recorded this with 2 microphones. Here is what I got:
Quite a lot of reverb, that's exactly what we want to catch with an IR!
-
Now, let's use some Digital Signal Processing to get the IR. All the source code in Python is here. If you're into math, here is the idea:
ais the input sweep signal,hthe impulse response, andbthe microphone-recorded signal. We havea * h = b(convolution here!). Let's take the discrete Fourier transform, we havefft(a) * fft(h) = fft(b), thenh = ifft(fft(b) / fft(a)). - Here is the result, the Impulse Response of the church:
Then, of course, we can do some cleaning, fade out, etc.
But what is this useful for? You can use this Impulse Response in any music production software (the VST SIR1 is quite good and freeware) , and make any of your recordings (voice, instrument, etc.) sound like if they were recorded in this church. This is the magic of convolution reverb!
Useful trick when you record your own IR: play sweep0.wav in the building instead of sweep.wav. The initial "beep" is helpful to see exactly where things begin. If you don't do that, as the sweep begins with very low frequencies (starting from 20 Hz), you won't know exactly where is the beginning of your microphone-recording. Once your recording is done, you can trim the soundfile by making it begin exactly 10 seconds after the short beep.

 twitter
 email
email github
 linkedin
 freelancing
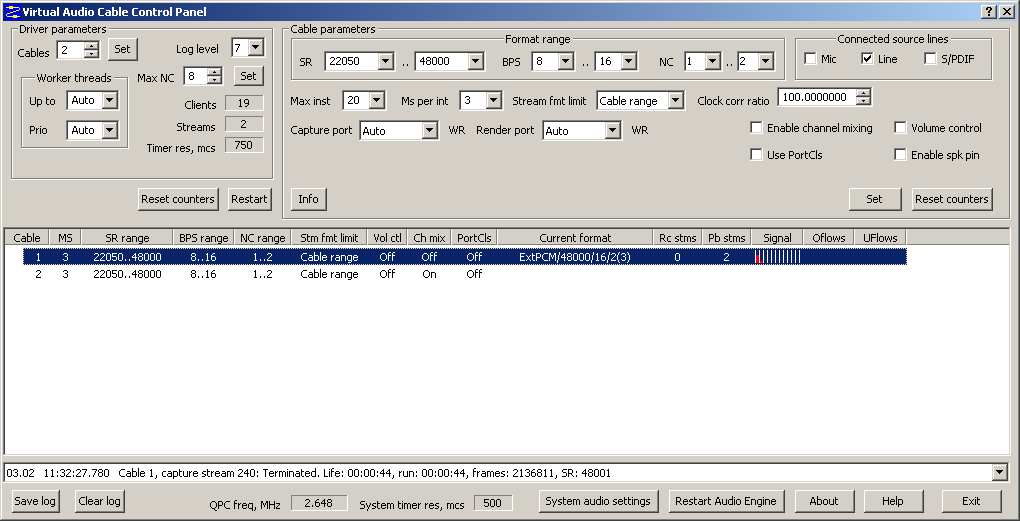